

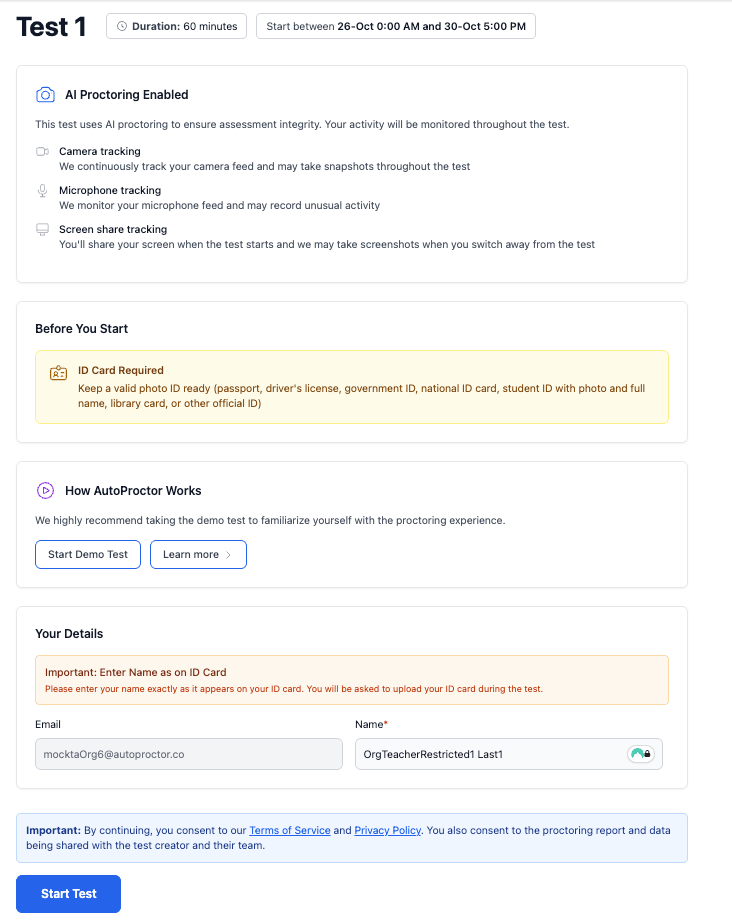
How the Instructions Page Works
Candidates see the instructions page right after clicking the test link. It is active on all tests and cannot be disabled. A test’s Settings call this page the start page. You control what you add to it from the Before the test section.Adding Custom Instructions
You can add your own instructions (maximum 200 words). They appear on the instructions page alongside the default content.1
Open the Before the Test Section
Go to your Tests page, click Settings next to the test, and choose Before the test.
2
Turn On Additional Instructions
Turn on Show additional instructions.
3
Enter Your Custom Instructions
Type your text in the Instructions box and click Save settings. The text is plain text and line breaks are kept.
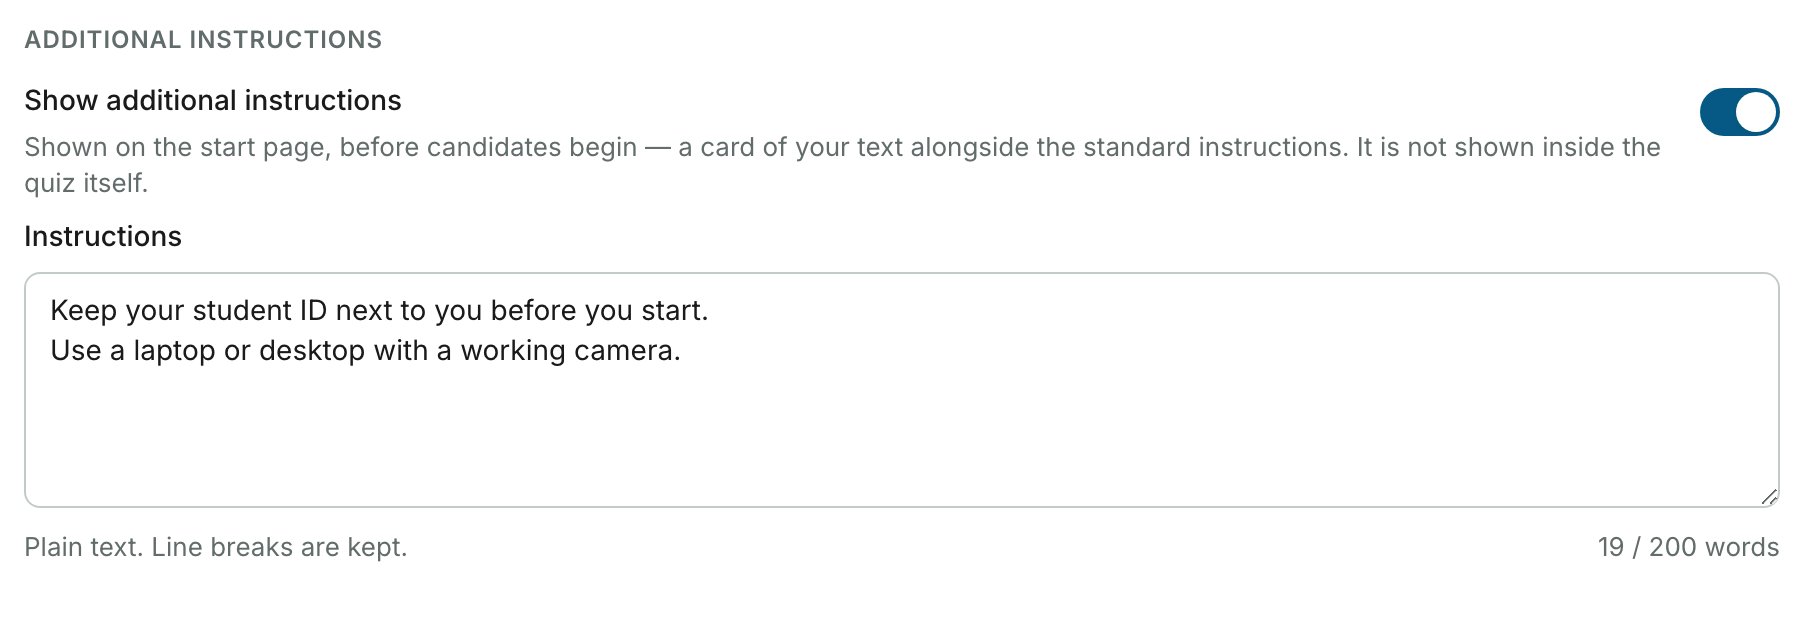
Adding custom instructions requires an Elite plan subscription. See Elite Features for what the plan includes.
Gathering Additional Information from Candidates
Use Collect candidate details to ask every candidate for extra information, such as a phone number or a student ID. Candidates must complete all the fields before starting the test.1
Open the Before the Test Section
Go to your Tests page, click Settings next to the test, and choose Before the test.
2
Turn On Candidate Details
Turn on Collect candidate details.
3
Add Your Fields
Click a suggestion, or click Add field and type a field name. Drag the fields to reorder them, then click Save settings.
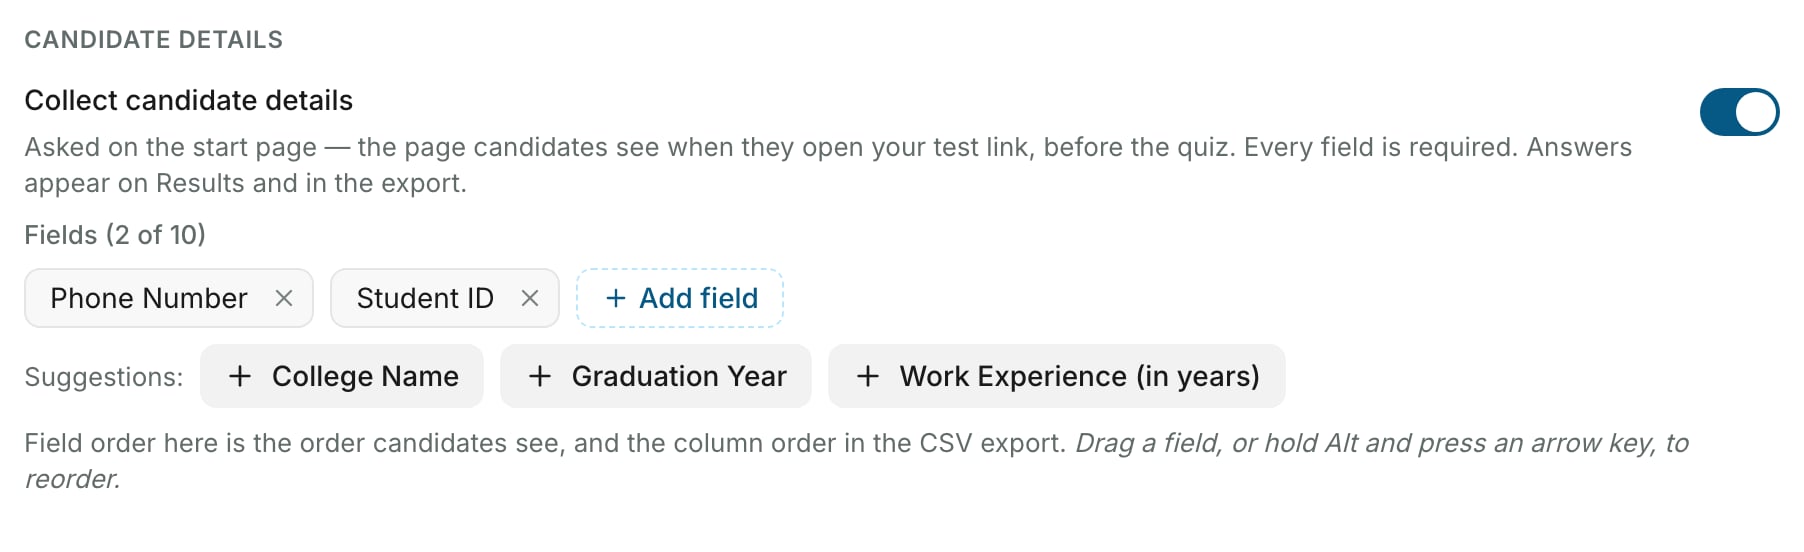
The answers appear on the test’s results and in the export.
Collect candidate details requires a Premium or Elite plan.
Frequently Asked Questions
Can I preview the instructions page before sharing the test link?
Can I preview the instructions page before sharing the test link?
Yes. At the top of the test’s Settings page, click Preview next to Copy link. The page opens in a new tab, exactly as candidates will see it.
Does viewing the instructions page use a credit?
Does viewing the instructions page use a credit?
No. Credits are only deducted when a candidate successfully starts the test, not when they view the instructions page.
Can I remove sections from the instructions page?
Can I remove sections from the instructions page?
No. The default sections are fixed and cannot be removed. You can only add additional instructions on top of the existing content.
Related Resources
- Timer Settings - Configure test timer and related settings
- Advanced Settings - Configure custom instructions and additional details
- Instructions for Taking a Proctored Test - What candidates need to know for proctored tests
- Elite Features - Learn about Elite plan capabilities
- Device Compatibility - Supported browsers and devices
- Contact Us - Reach out if you need further help