> ## Documentation Index
> Fetch the complete documentation index at: https://help.autoproctor.co/llms.txt
> Use this file to discover all available pages before exploring further.
# Your First Proctored Test
> A step-by-step guide to creating, configuring, and sharing your first proctored test on AutoProctor.
Create a proctored test, share the link with candidates, and view results — all in under 5 minutes.
## Create Your First Test
Go to the [AutoProctor sign-in page](https://www.autoproctor.co/account/login/role/test-admin) and sign in with your **Google** account, **Microsoft** account, or **email address**. You'll land on your dashboard, where all your tests are listed.
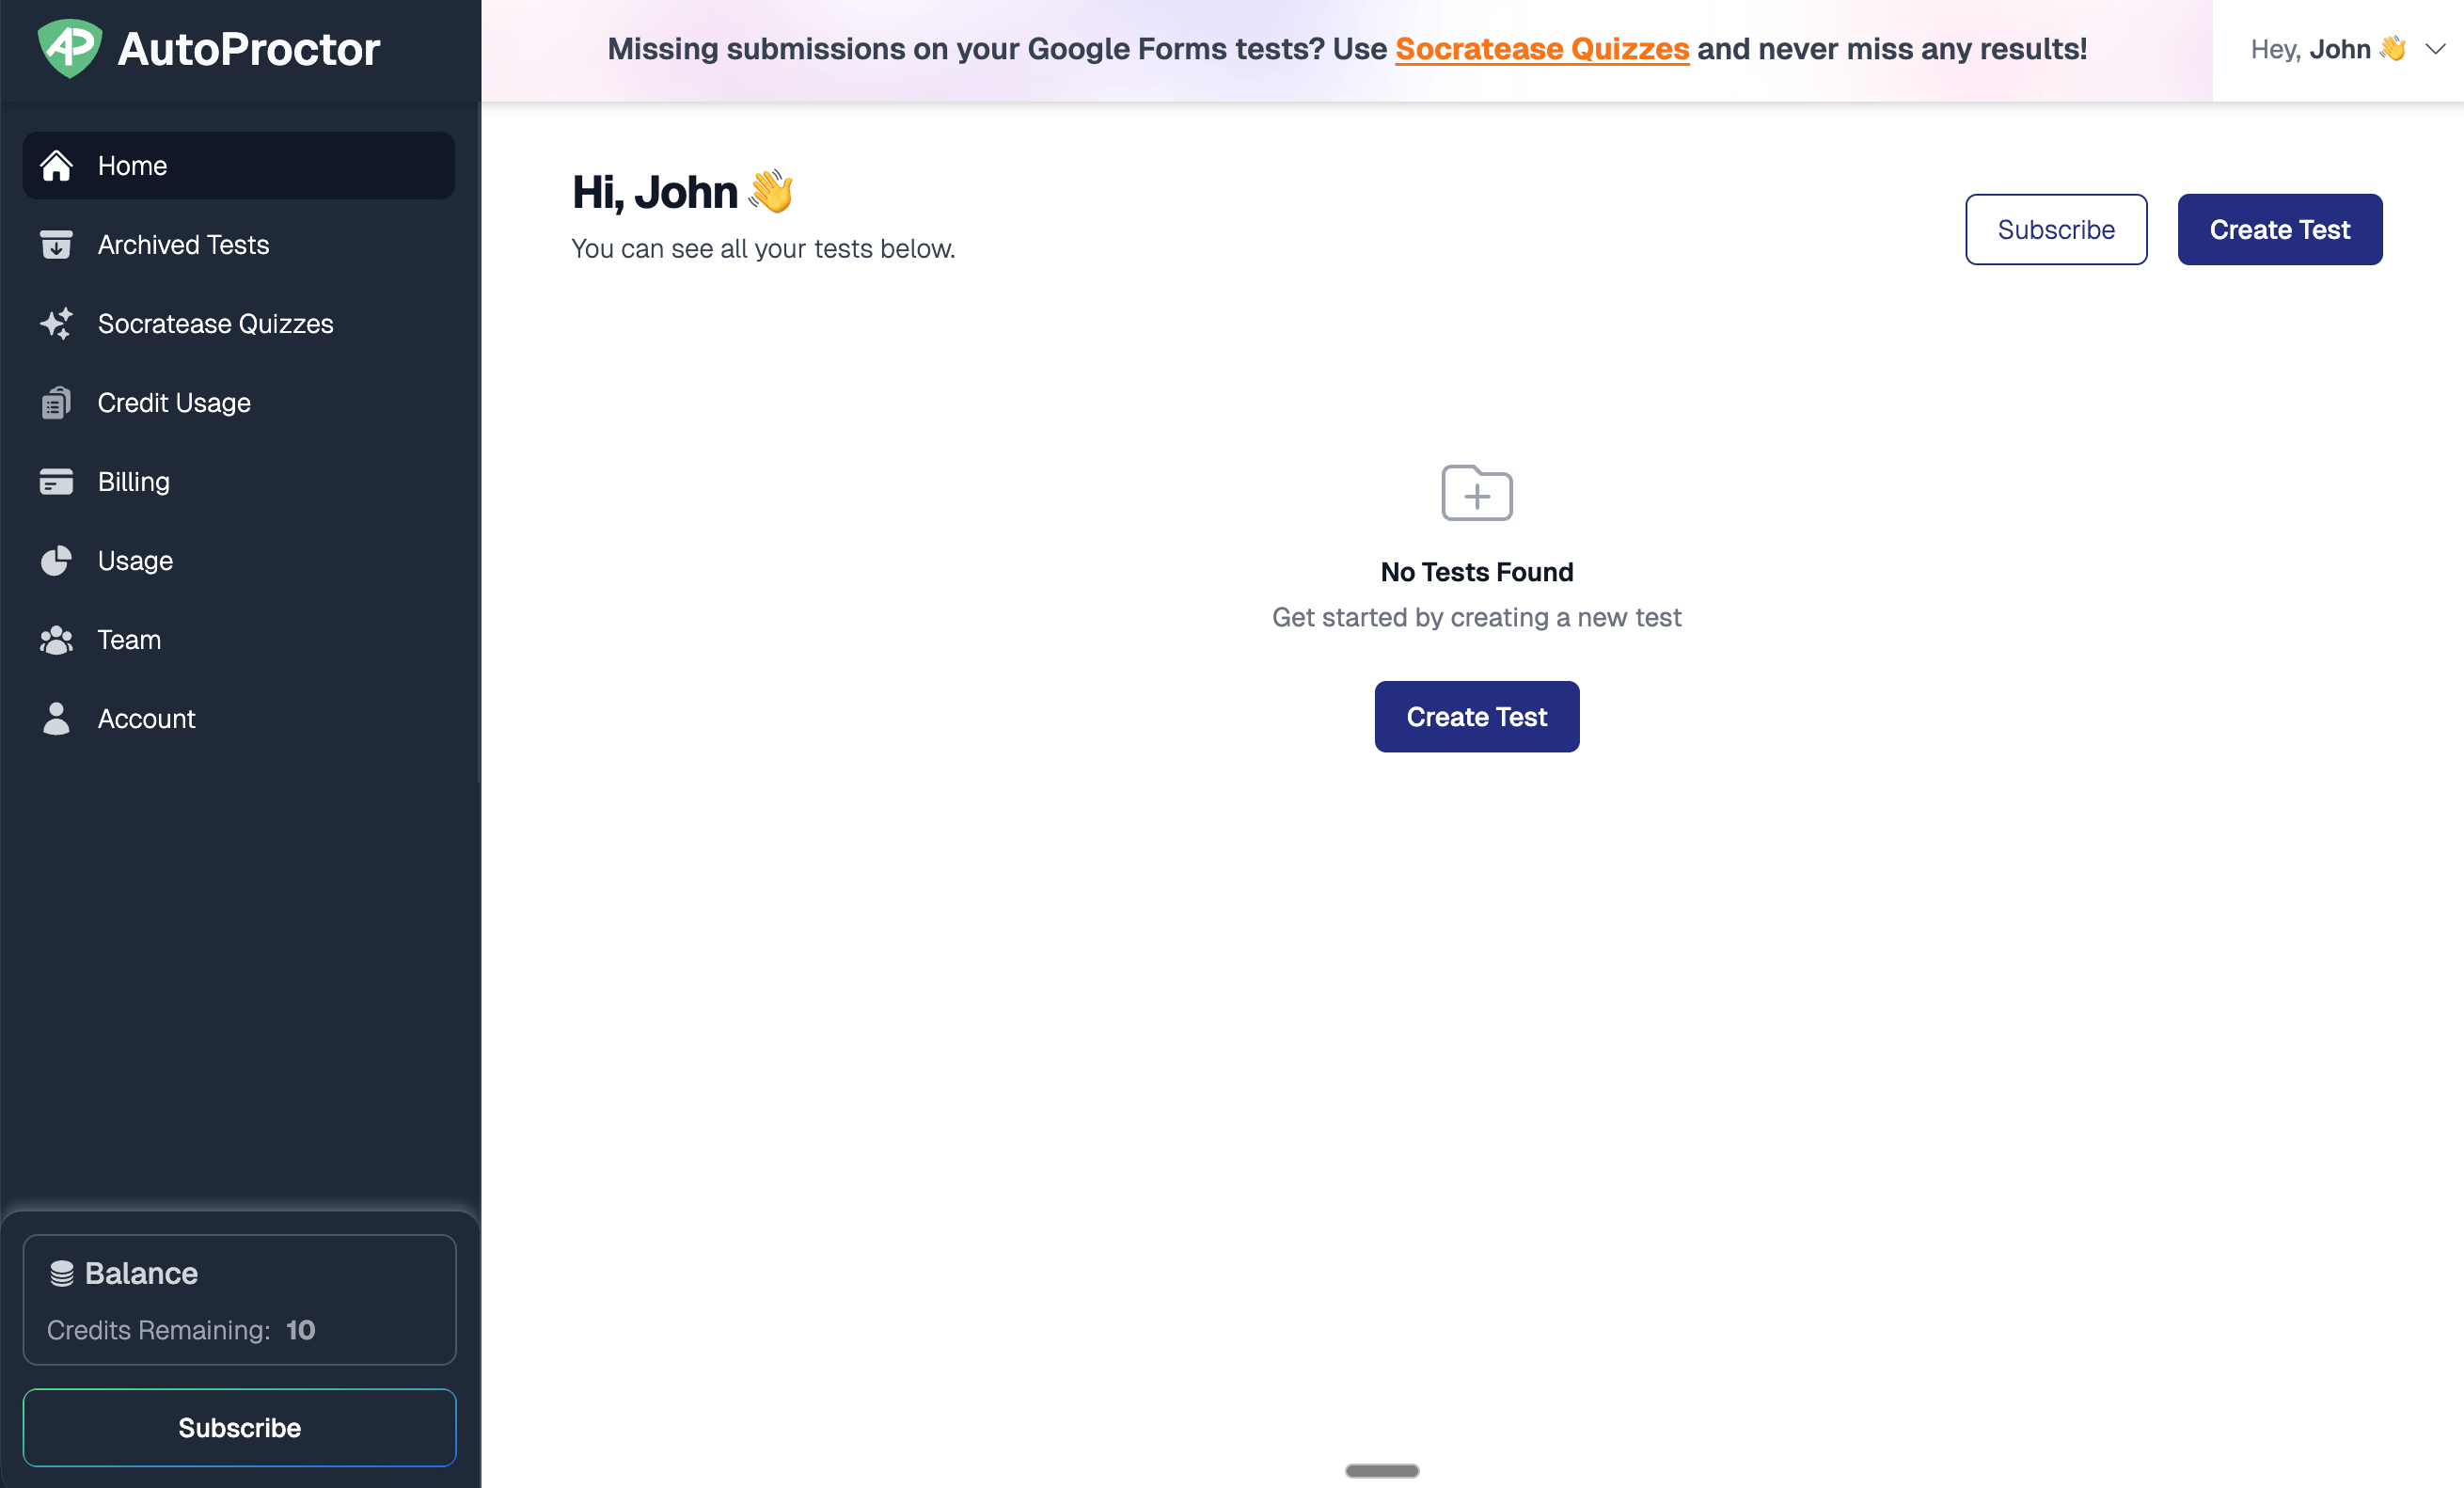 Click **Create Test** on your dashboard. Choose a quiz provider:
| Provider | When to Use |
| ---------------------------- | ---------------------------------------------------------------- |
| **Socratease Quizzes** | You want to create a quiz directly on AutoProctor |
| **Google Forms** | You already have a Google Form |
| **Microsoft Forms** | You already have a Microsoft Form |
| **Other Quizzing Platforms** | You use another platform (TypeForm, ProProfs, ClassMarker, etc.) |
Click **Create Test** on your dashboard. Choose a quiz provider:
| Provider | When to Use |
| ---------------------------- | ---------------------------------------------------------------- |
| **Socratease Quizzes** | You want to create a quiz directly on AutoProctor |
| **Google Forms** | You already have a Google Form |
| **Microsoft Forms** | You already have a Microsoft Form |
| **Other Quizzing Platforms** | You use another platform (TypeForm, ProProfs, ClassMarker, etc.) |
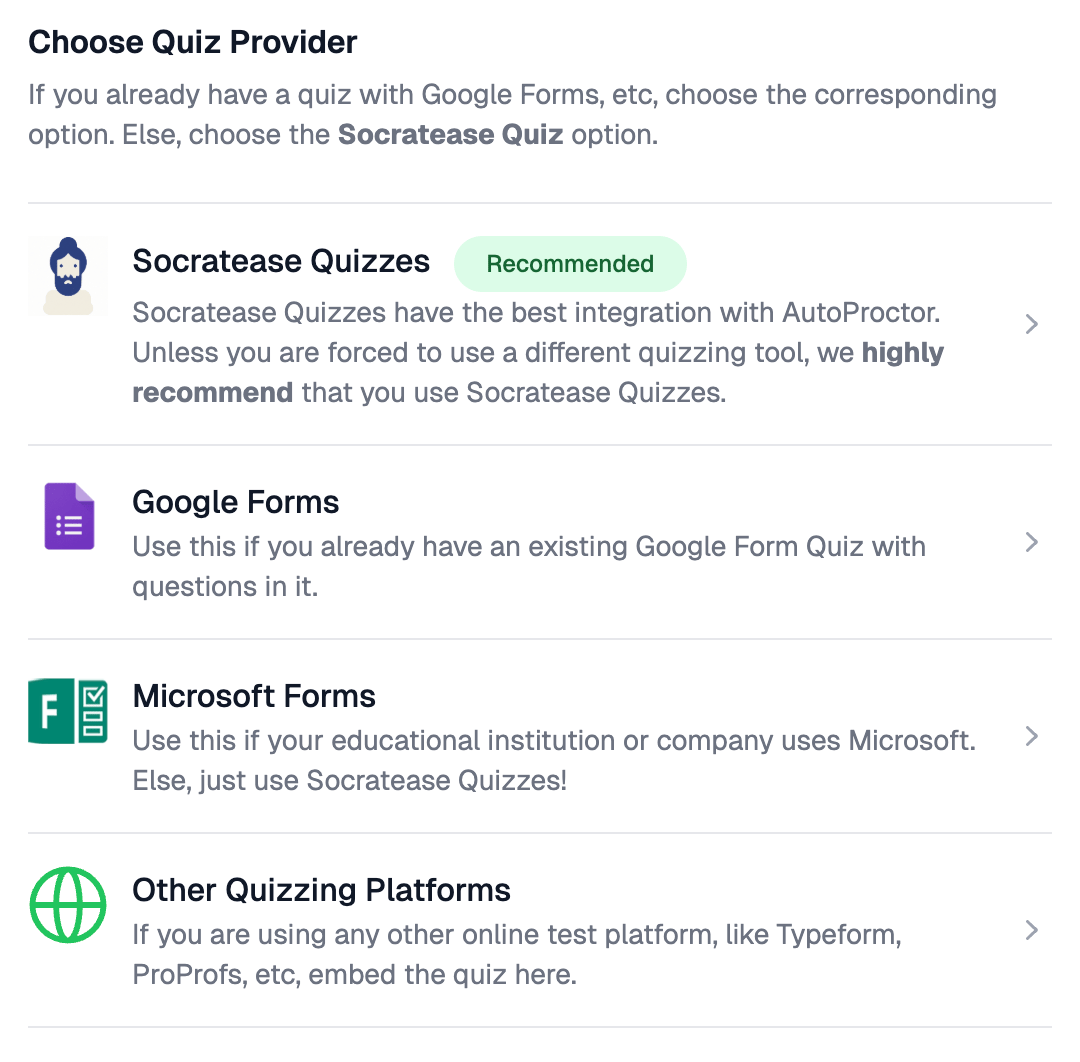 Select your provider and follow the prompts to connect your quiz.
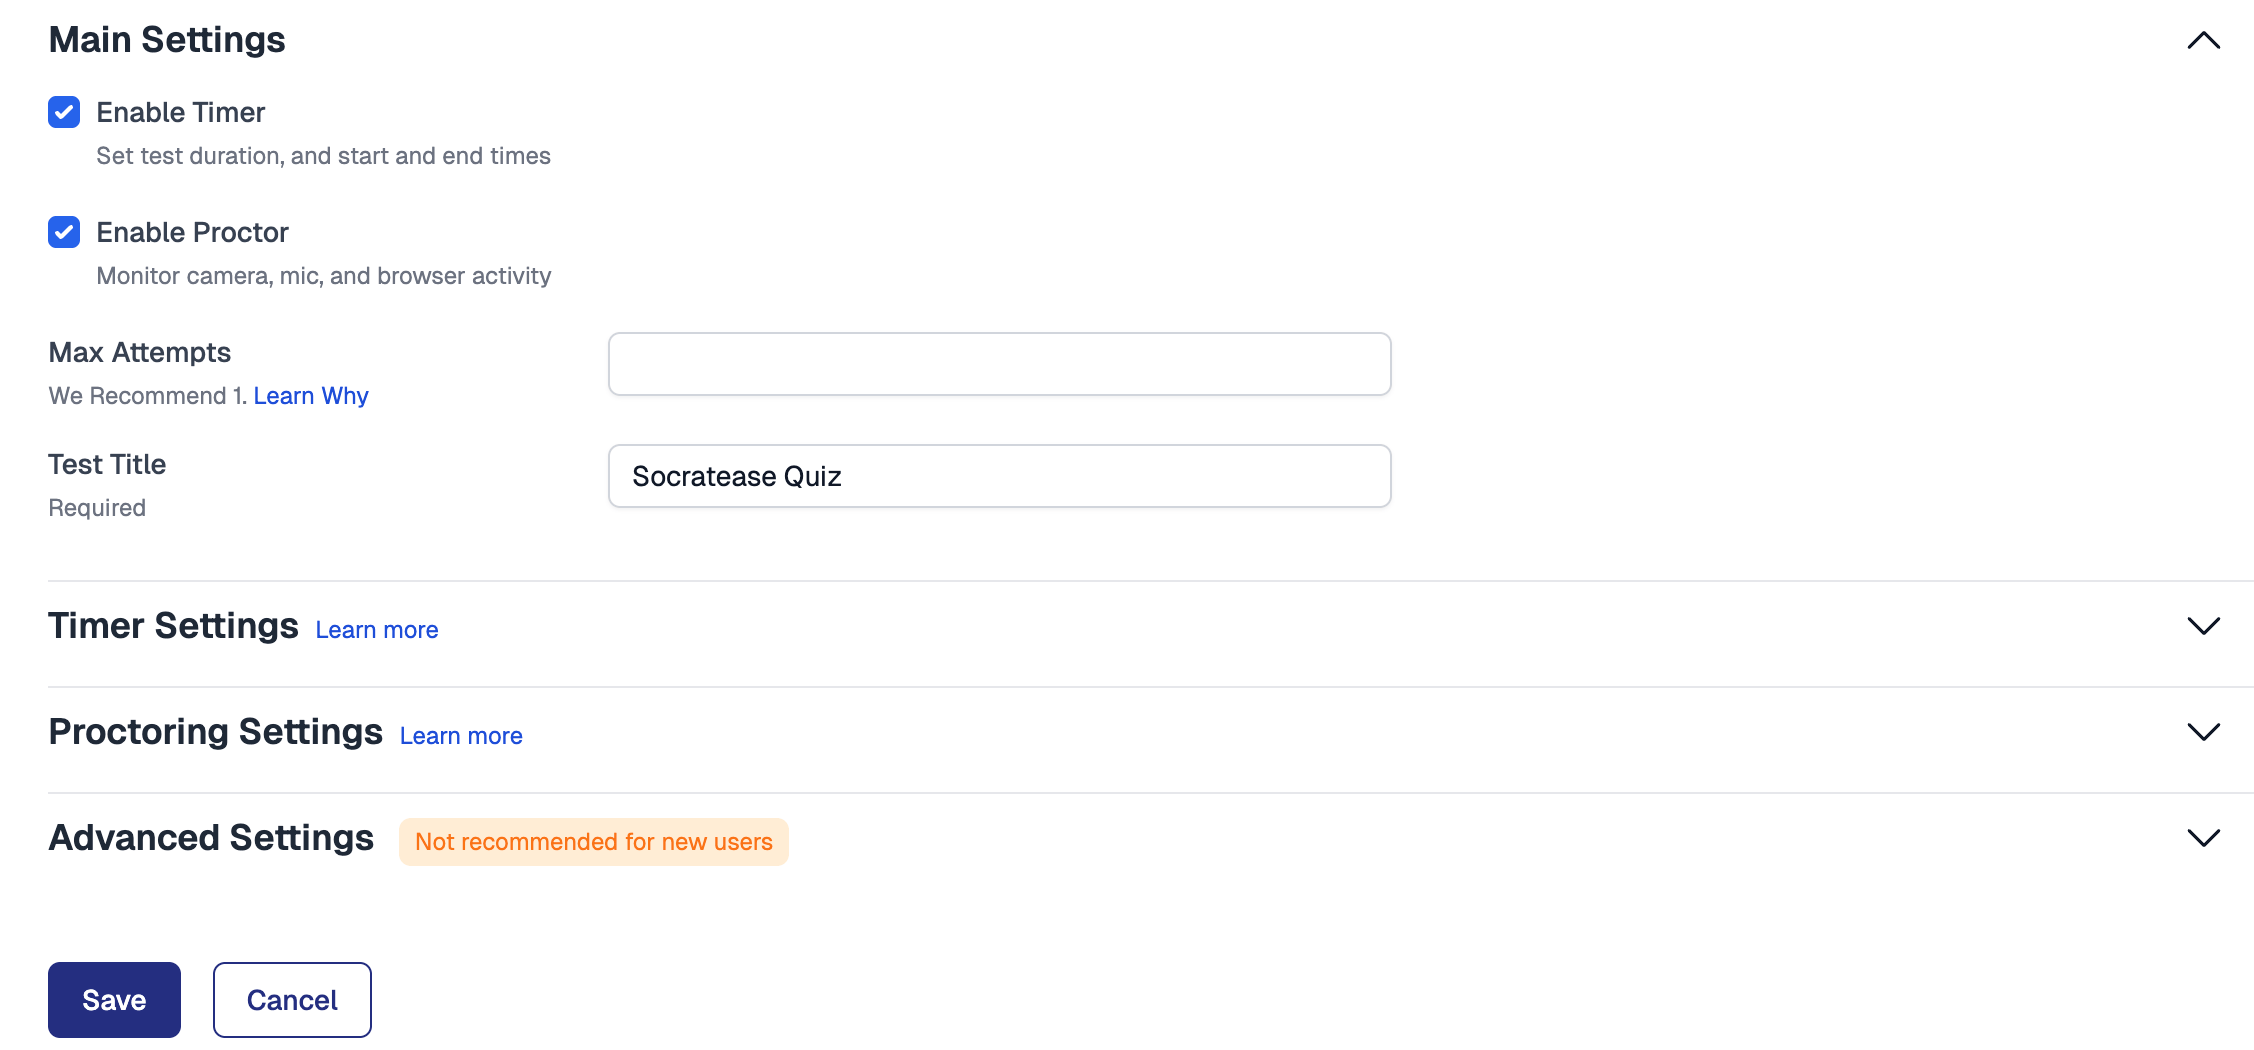
Click **Settings** on the test to configure:
* **Main Settings** — Enable the timer and proctoring, set [maximum attempts](/maximum-exam-attempts), and name your test
* **[Timer Settings](/timer-settings)** — Set a duration, start window, and submission deadline
* **[Proctoring Settings](/proctoring-settings)** — Enable camera, microphone, tab-switching detection, and more
* **[Advanced Settings](/advanced-exam-settings)** — Choose login methods and add restrictions
Select your provider and follow the prompts to connect your quiz.
Click **Settings** on the test to configure:
* **Main Settings** — Enable the timer and proctoring, set [maximum attempts](/maximum-exam-attempts), and name your test
* **[Timer Settings](/timer-settings)** — Set a duration, start window, and submission deadline
* **[Proctoring Settings](/proctoring-settings)** — Enable camera, microphone, tab-switching detection, and more
* **[Advanced Settings](/advanced-exam-settings)** — Choose login methods and add restrictions
 For your first test, the default proctoring settings work well. You can fine-tune them later based on your needs.
Before sharing, click the test link yourself to verify the candidate experience. Confirm that the **instructions page**, **camera check**, and **proctoring setup** all load correctly.
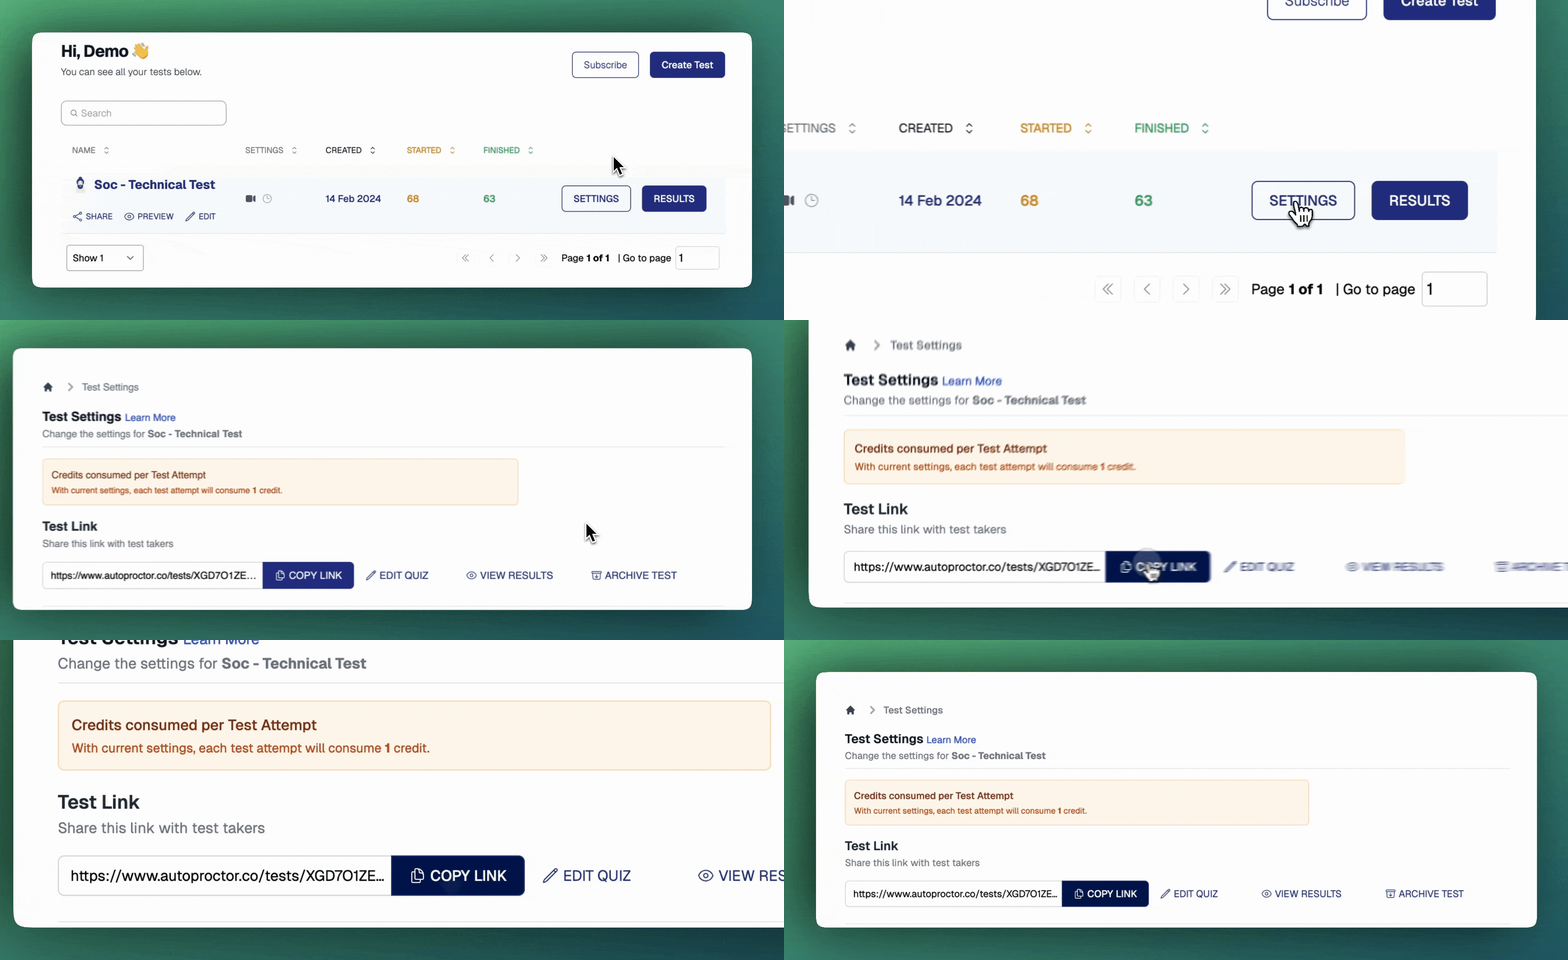
Copy the test link from your dashboard and share it with candidates via:
* **Email** — or use [Invite via Email](/invite-candidates-via-email) for direct invitations
* **Your LMS** or classroom platform
* **Any messaging tool** — but tell candidates to copy the link and open it in **Chrome** or **Firefox**, not the app's built-in browser
For your first test, the default proctoring settings work well. You can fine-tune them later based on your needs.
Before sharing, click the test link yourself to verify the candidate experience. Confirm that the **instructions page**, **camera check**, and **proctoring setup** all load correctly.
Copy the test link from your dashboard and share it with candidates via:
* **Email** — or use [Invite via Email](/invite-candidates-via-email) for direct invitations
* **Your LMS** or classroom platform
* **Any messaging tool** — but tell candidates to copy the link and open it in **Chrome** or **Firefox**, not the app's built-in browser
 See [Best Practices for Test Creators](/best-practices-for-exam-creators) for more on distributing test links.
Once candidates complete the test, go to your [dashboard](https://www.autoproctor.co/test-admin/home/) and click **Results** to see:
* **Trust scores** for each candidate
* **Proctoring violation** details
* **Photos, recordings, and evidence**
* **Quiz scores** (only if you used Socratease)
See [Best Practices for Test Creators](/best-practices-for-exam-creators) for more on distributing test links.
Once candidates complete the test, go to your [dashboard](https://www.autoproctor.co/test-admin/home/) and click **Results** to see:
* **Trust scores** for each candidate
* **Proctoring violation** details
* **Photos, recordings, and evidence**
* **Quiz scores** (only if you used Socratease)
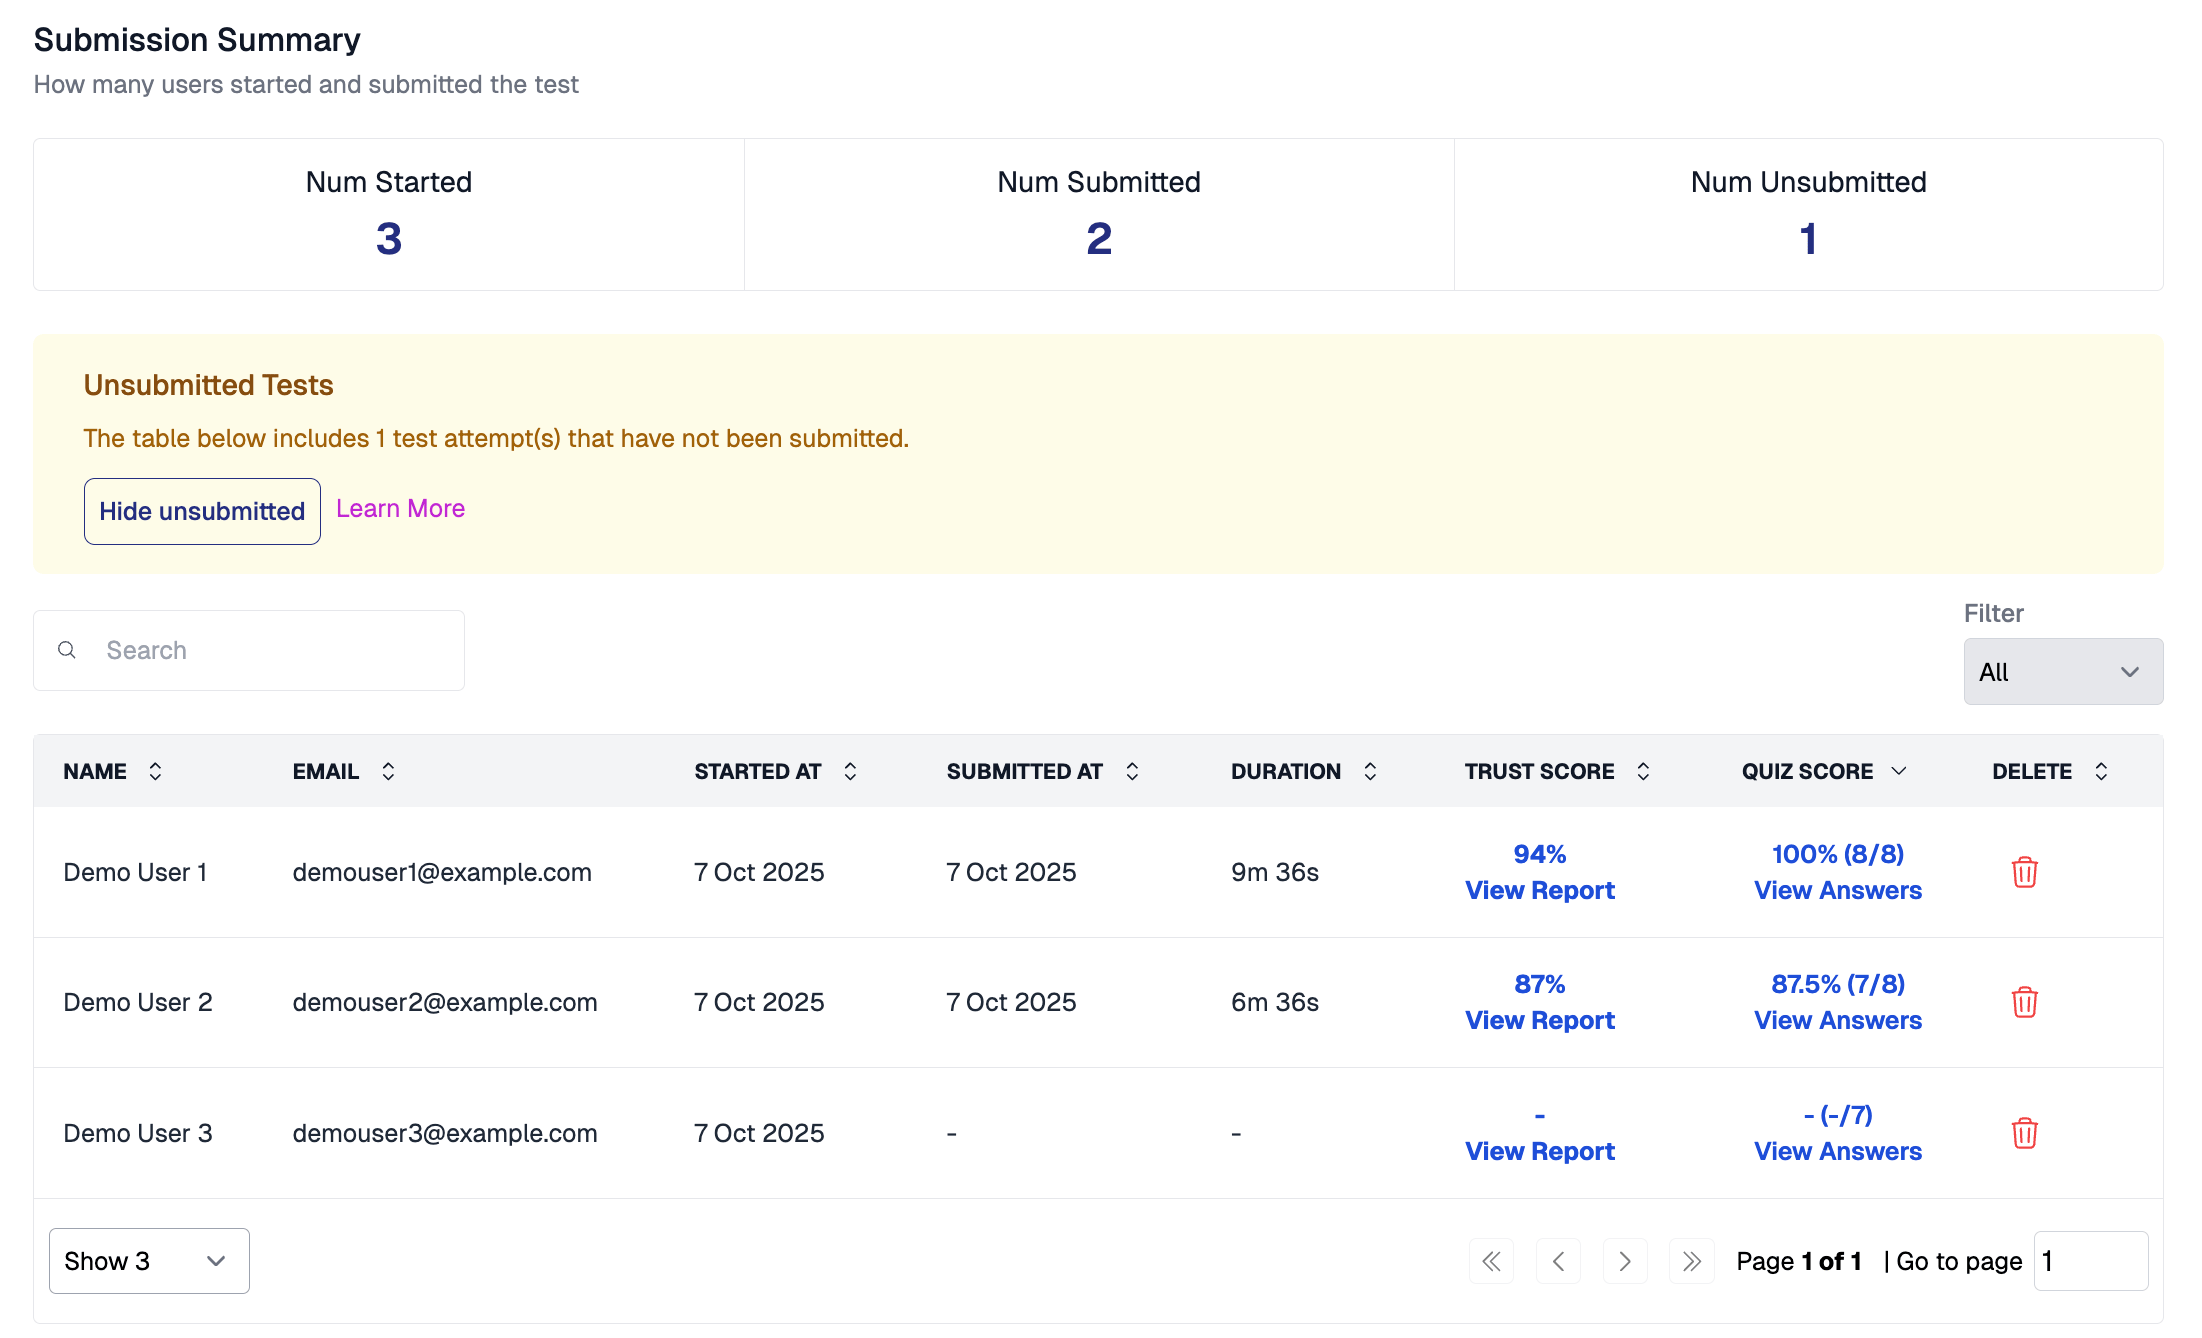 For a detailed guide, see [Where Can I See My Quiz Results?](/where-to-find-quiz-results).
## Related Resources
* [Quiz Providers](/supported-quiz-providers) — All supported quiz platforms
* [Timer Settings](/timer-settings) — Configure test duration and time windows
* [Proctoring Settings](/proctoring-settings) — Configure what gets monitored
* [FAQs](/faqs) — Common questions about AutoProctor
* [Best Practices for Test Creators](/best-practices-for-exam-creators) — Tips for running proctored tests
For a detailed guide, see [Where Can I See My Quiz Results?](/where-to-find-quiz-results).
## Related Resources
* [Quiz Providers](/supported-quiz-providers) — All supported quiz platforms
* [Timer Settings](/timer-settings) — Configure test duration and time windows
* [Proctoring Settings](/proctoring-settings) — Configure what gets monitored
* [FAQs](/faqs) — Common questions about AutoProctor
* [Best Practices for Test Creators](/best-practices-for-exam-creators) — Tips for running proctored tests